





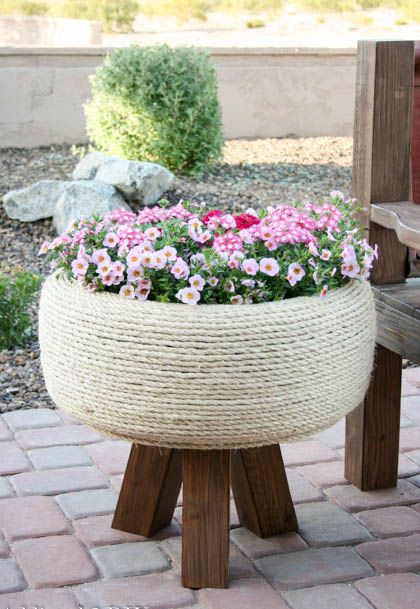
Transforming an old tire into a planter is a creative and ecological way to reuse materials. Here's a step-by-step guide to building a planter with a recycled tire.
Necessary materials
- 1 old tire
- 3 pieces of 4x4 lumber, cut to 12 inches with 15-degree angles
- 200 feet of 3/8 inch sisal rope
- Waterproof paint
- 2 inch pocket screws
- Kreg Jig Tool or Angle Brackets
- 2 inch bolts and nuts
- 3/4 inch plywood

Step 1: Prepare the Legs
- Cutting the legs: Cut the pieces of wood to 12 inches with 15-degree angles on each end to form the legs of the planter.

Step 2: Create the Base
- Cutting the plywood: Use the plywood to cut a circle the same diameter as the tire. This will be the base of the planter.

Make some drawings and calculate the diameter for the holes to hold both pieces.

Step 3: Assemble Base and Tire
- Tire and base joint: Drill holes in the plywood and tire. Secure the tire to the base using bolts and nuts.

Press firmly to secure.

Step 4: Attach the Rope
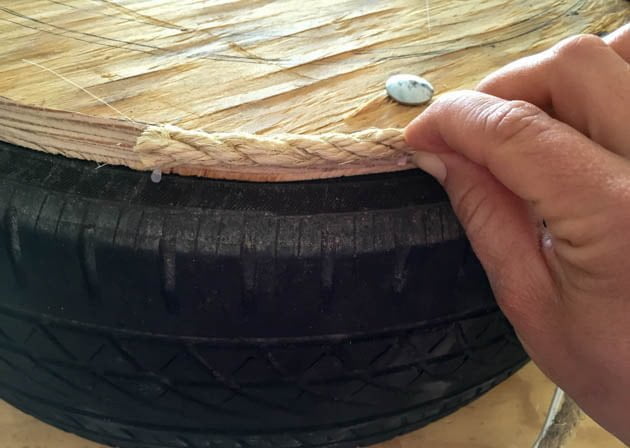
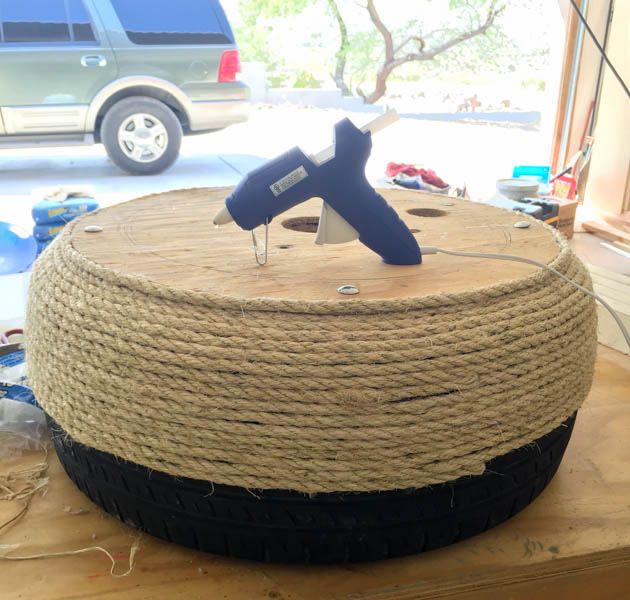
- Rope Application: Start by applying hot glue to the wooden base and wrap the sisal rope around the tire. Make sure the rope is tight and without gaps.
Step 5: Install the Legs
- Attaching the legs: Use pocket screws or angle brackets to attach the legs to the plywood base.

Place the legs according to the image, and then drill holes.
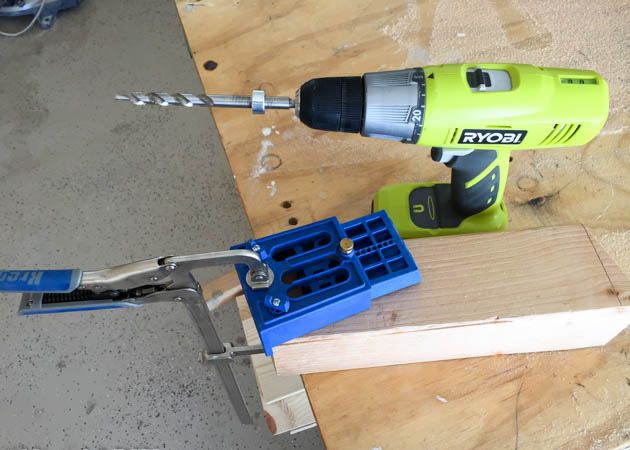
Drill 1 1/2″ pocket holes in two sides of the 4x4 posts.

Attach to the wood bottom using 2″ pocket screws. If you don't have a Kreg Jig, you can also use angle wrenches.

Step 6: Final Finish
- Sanding and Painting: Sand the legs to smooth the surfaces and apply a coat of waterproof paint to protect the wood from moisture.

Additional Tips
- Moisture prevention: Place a plastic tray inside the tire to prevent water from the plants from coming into direct contact with the wood.
- Strong Adhesive: In hot weather, consider using a stronger adhesive to ensure the rope stays in place.
Get more information on our page perfectaidea.com and on our facebook for more ideas.